 |
 |
 |
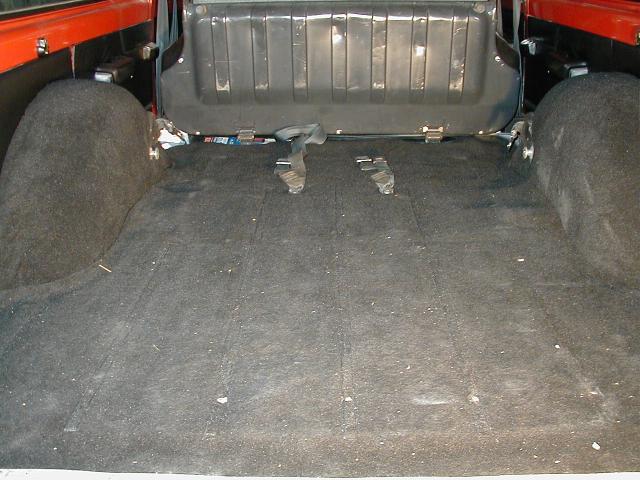
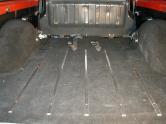
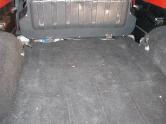
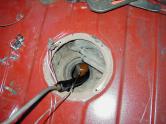
| This
(or something similar) is what you start with. You will want to
fold the rear seat forwards in order to access the access panel.
If you have a Wagoneer or 4 door Cherokee you can get to the access
panel through the rear drivers side door. |
First
remove all the trim pieces that are screwed down through the carpet
and into the floor. There should be 2 screws in each trim strip. |
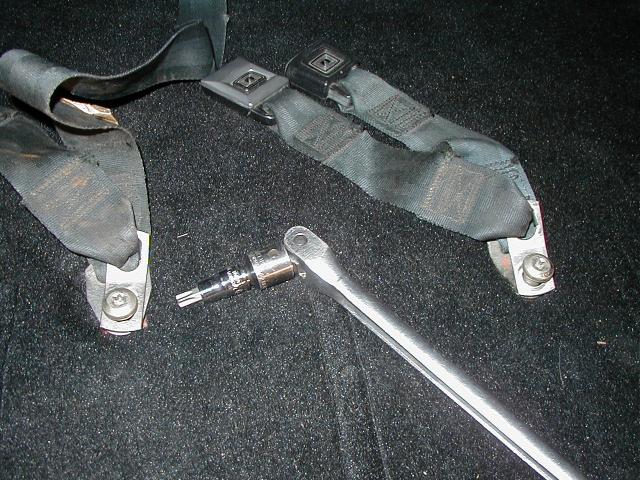
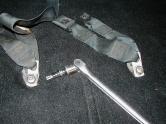
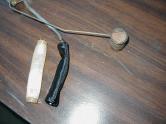
You
then need to remove the rear seat belts. The bolt will require a
T-50 Torx bit, and probably a 1/2" breaker bar as shown. They
will be very tight and may be rusted as well. You can spray some
penetrating oil on the bolts from the bottom of the Jeep. |
|
 |
 |
 |
| After
removing the rear seat belts, make sure the rear area is empty to
you can roll back the carpet. |
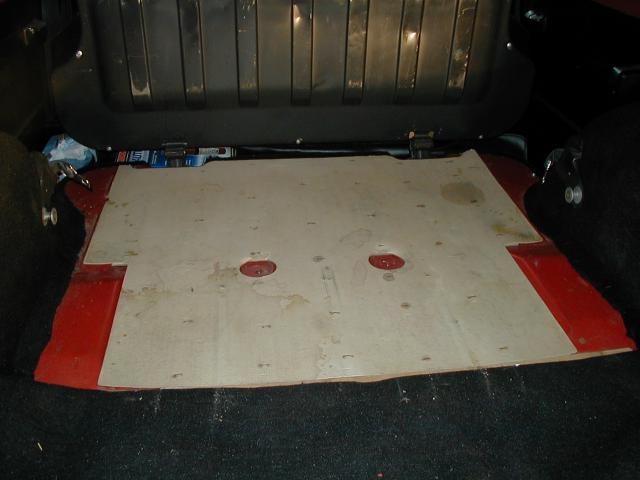
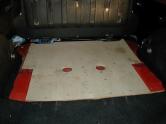
Under
the carpet you should/may find a cardboard liner as shown. You only
need to roll back the carpet far enough to remove the forward half
of this cardboard liner, it is in two sections. |
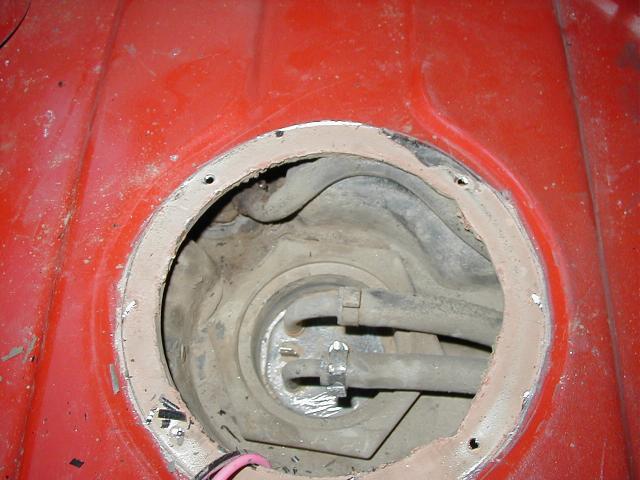
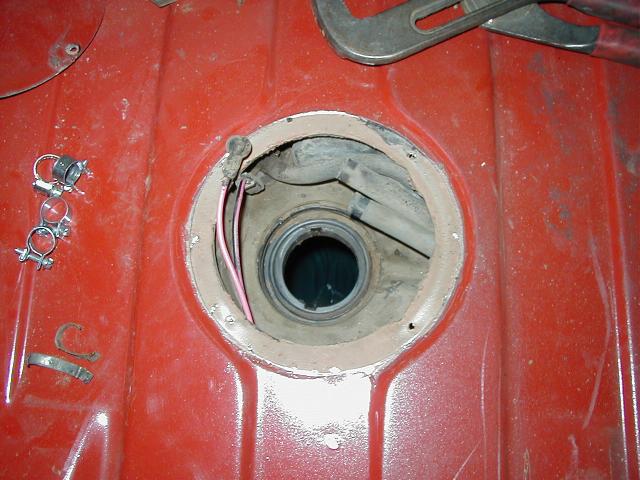
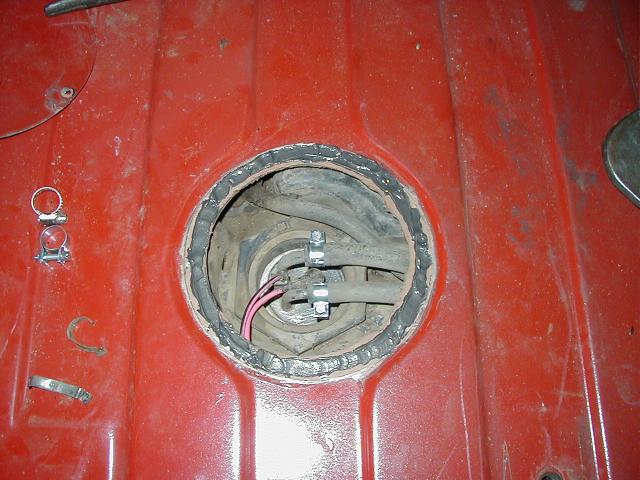
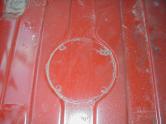
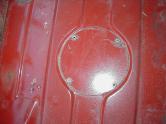
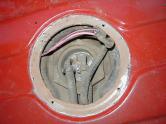
After
you remove the cardboard liner, you should see a round cover plate
toward the front of the rear floor area and on the drivers side. |
|
 |
 |
 |
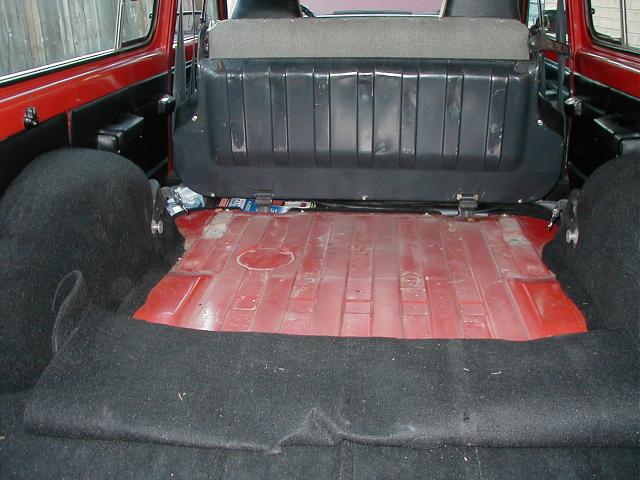
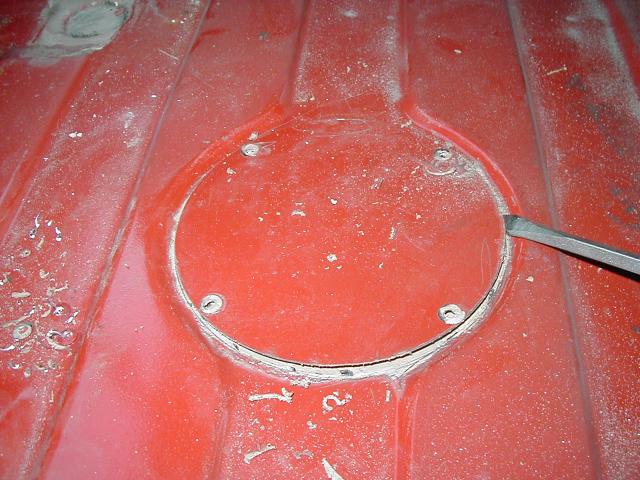
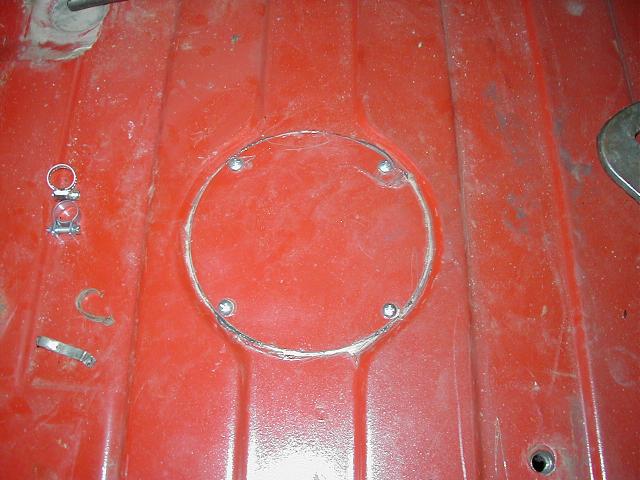
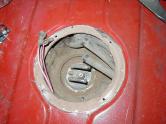
| If
the access panel has never been removed before it should look like
this, if it is held down with screws insead of rivets then it has
been accessed before. |
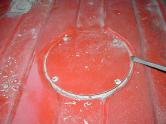
Using
a drill with a 1/8" to 3/16" bit, carefully drill down
the center of each rivet just until the head of the rivet is loose
(it will probably stick to the bit and spin with it). |
Originally
the cover is sealed to the floor with a pretty tough sealant. You
will need to use a medium flat screwdriver and hammer to get break
the seal. Carefully go all the way around the plate only prying
slightly up at each point so you don't bend the cover. If you do
bend the cover, it is fairly easy to straighten. |
|
 |
 |
 |
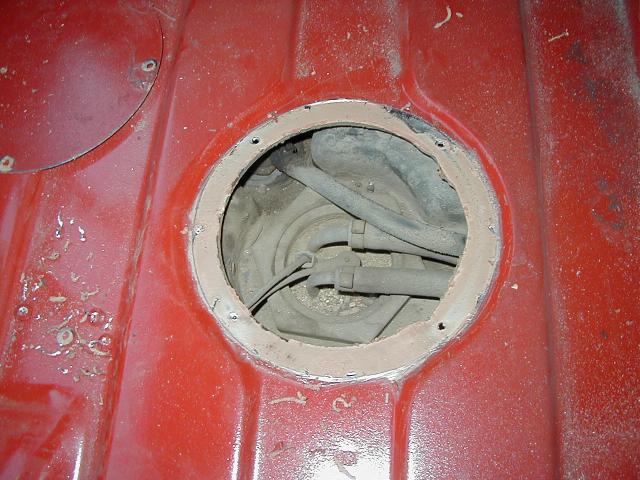
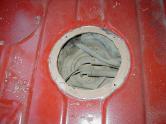
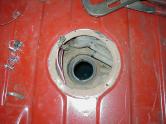
| Once
you get the cover off you will likely find lots of dirt and possibly
some fuel staining. If you smell fuel vapor at this point, you probably
have a bad hose as well which should be replaced. If you need to
replace the fuel lines, you may need to drop the fuel tank to do
it. |
You
will need to clean out the dirt. Loosen the caked dirt with a wooden
or plastic stick. Use compressed air to blow the dirt away from
the sending unit. DO NOT USE AN ELECTRIC VACUUM - IT COULD CAUSE
AN EXPLOSION. At this point you need to be very careful about any
type of spark or ignition source as there are going to be fuel vapors
around. |
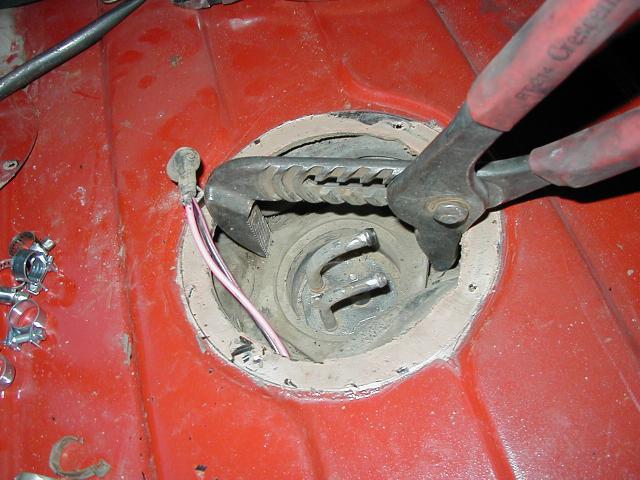
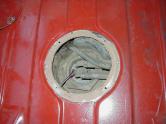
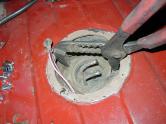
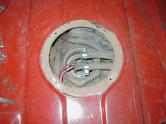
Remove
the two wires from the sending unit. You may find it easier to use
a pair of medium length needle-nose pliers for this job. After removing
the wires, you can tape them to the floor away from the hole if
they seem to be getting in your way. |
|
 |
 |
 |
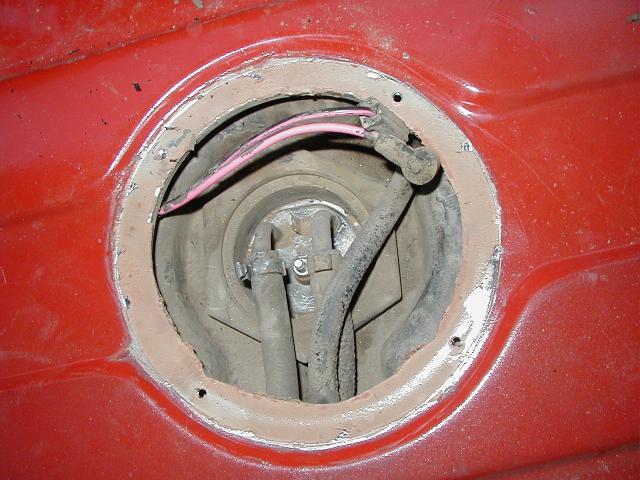
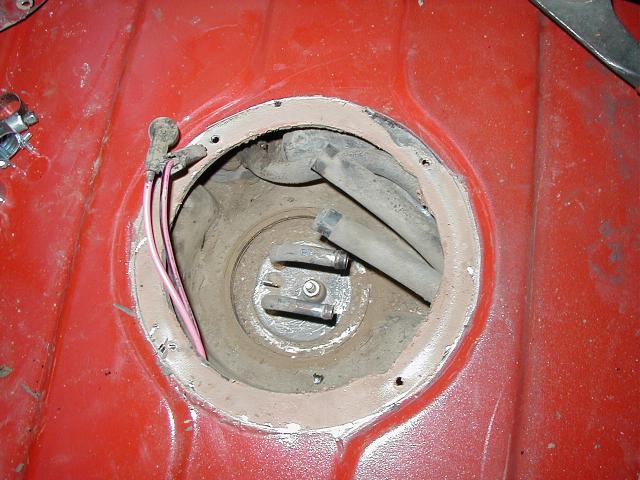
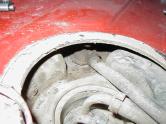
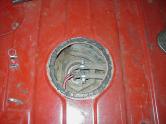
| Notice
that one of the 3 hoses is not in a very friendly location. Unless
you need to remove this hose from the tank because you are replacing
it, just leave it be, it can be moved out of the way. |
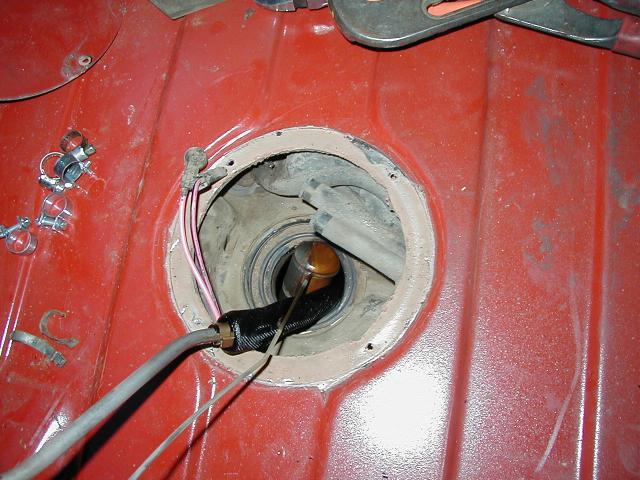
Here
I have tucked the 3rd hose out of the way by carefully rolling it
between the body and the gas tank. Don't force it in there with
a screwdriver or you may puncture or otherwise damage the hose.
Notice the factory clamps on the fuel lines, these must be cut off
with a set of side cuters to be removed. |
Remove
the hoses and tuck, tape, or otherwise hold them out of the way.
Don't loose them down the channel in the fuel tank where they are
routed though. Use a large set of Channel-Lock pliers to gently
unscrew the sending unit retaining nut. You may want to use compressed
air again prior to this to clean out any additional dirt. |
|
 |
 |
 |
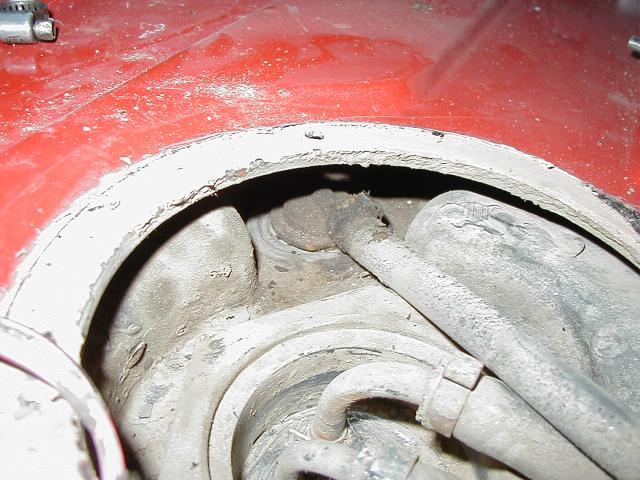
| Once
the retaining nut is removed you will want to clean the area again
with compressed air. You want as little dirt as possible to fall
int the tank when you remove the sending unit. |
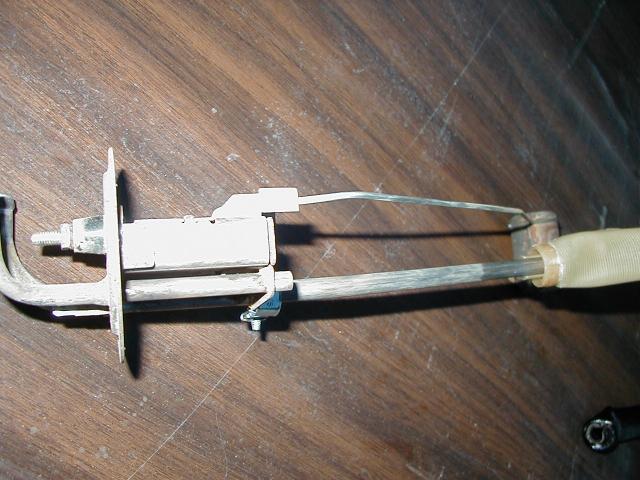
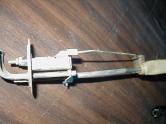
You
can now gently lift up the sending unit to remove it. Note the float
in the picture, be very careful not to loose this off the end of
the fuel sensing rod (especially if you are not replacing the sending
unit), because you will never retrive it again. Also be very careful
not to permanently bend the sensing rod while removing the unit,
you will need to flex it a bit but don't actually bend it. |
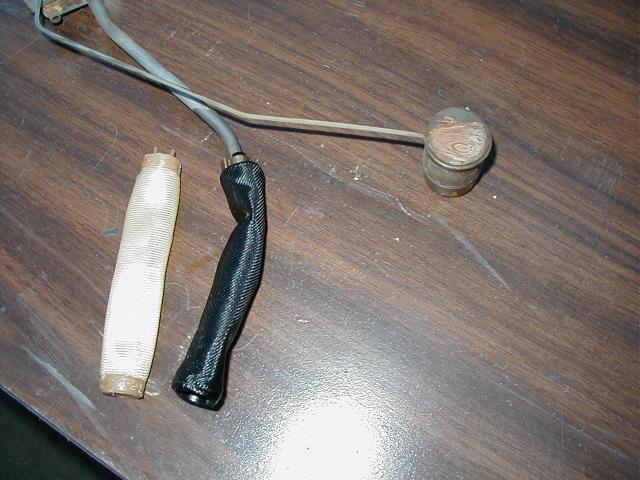
Notice
the difference between the old and new fuel sock. The original sock
is black where as the new one will be white, but the old one will
likely be clogged or disentigrated as well. Be sure to note the
orientation of the sock on the pickup tube (not only location, but
rotation as well). This is important for correct fuel pickup abilities. |
|
 |
 |
 |
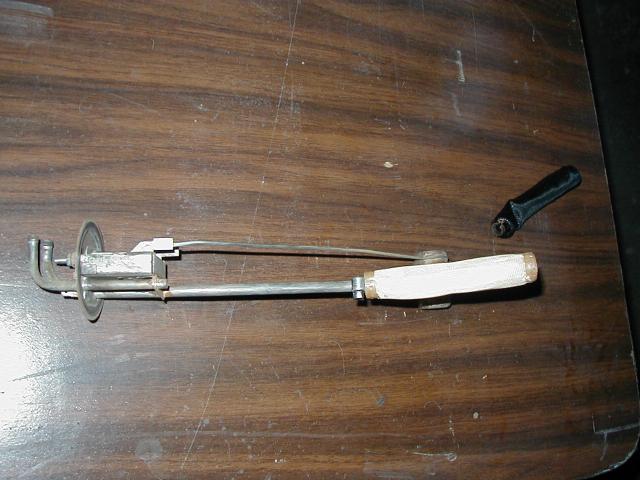
| Note
the orientation of the new fuel sock. You will need to use the side
cutters to remove the original clamp holding the sock onto the pickup
tube. Use a standard hose clamp to attech the new sock to the pickup
tube. |
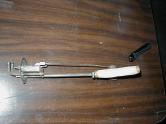
The
new sock is clamped onto the pickup tube, and the unit is ready
to be re-installed. |
There
is a rubber o-ring that seals the sending unit to the tank. Remove
this o-ring and thoroughly clean it (unless you are replacing it
with a new sending unit. Also clean the area again with compressed
air to remove any dirt that is still left. If you are re-using the
old o-ring you may want to put a very light coating of vaseline
on it depending on it's condition. |
|
 |
 |
 |
| Re-Install
the sending unit in the reverse order that you removed it in. Be
careful not to loose the float, don't damage the hoses, use new
hose clamps. Again, be careful during this process as there are
fuel vapors present. |
Before
replacing the cover, run a thin bead of RTV or Silicone sealant
around the opening to re-seal the cover preventing any potential
fuel vapors from entering the vehicle later on. |
Use
4 #10 x 3/8" sheet metal screws to re-attach the cover plate.
Check the length of your screws before installing the cover, if
they are too long they will penetrate the fuel tank. Tighten the
screws and allow some time for the sealant to cure before replacing
the carpet. |
|
|
|
|
| Replace
the cardboard liner, making sure the extra pieces on the bottom
line up with the ridges in the floor. |
Roll
the carpet back out and re-attach to the floor where necessary. |
Re-Attach
the seat belts, making sure the bolts are tight and secure. |
|
|
|
| Smoothe
out the carpet so the trim strips will lay back out nicely, and
do a double check to make sure you did not leave any tools behiend. |
Re-Attach
the trim strips and you are back to where you started, but with
a new fuel sock, sending unit, or both. |
|